
Last Updated on May 18, 2015 by Babita
My favorite brand of hot sugar wax is not available anymore. I searched them in all the stores and even checked online. I don’t know why the manufacturer stopped making them. When I checked on Amazon, the container of sugar wax which sells for around $10 was being sold for almost triple that price.
So I decided to make my own. I knew all the basic ingredients that went into making it. I was not aware however of the measurements. After researching online and finding tons of conflicting measurements, I decided to settle on the one below. I am glad I did it. Not only did the sugar wax turn out great, it also worked. The results were amazing.
I don’t know if anyone else would need it, but I decided to go ahead and post the recipe. This recipe is for hot sugar wax. On application, it will be hot/warm on your skin. You will also need to get the wax strips for hair removal.
Recipe for Natural Hot Sugar Wax:
Ingredients:
2 cups of granulated sugar
1/2 cup of lemon juice (either fresh or bottled)
1/2 cup water.
Preparation:
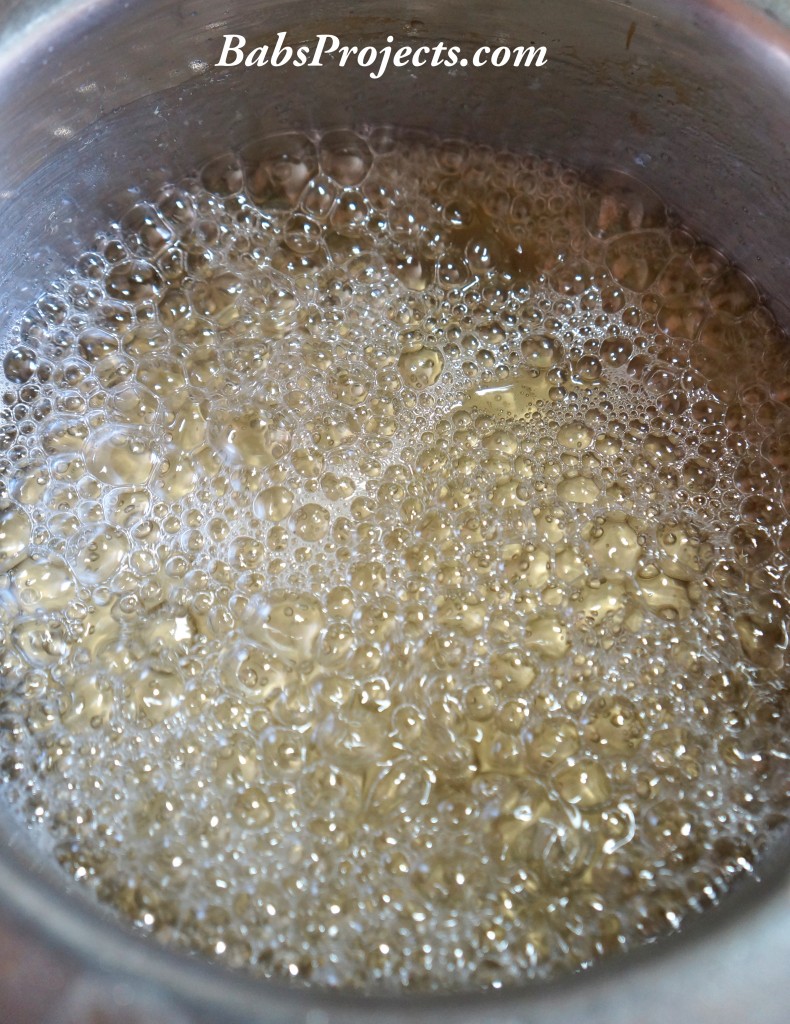
Combine all of the above ingredients in a sauce pan and bring it to a boil. Alternate between high to medium flame while cooking. Also keep on stirring it. After a couple of minutes you should be able to see bubbles form. Keep stirring until it is golden brown (which will be a good 20-25 mins).
Once it has reached the desired color and consistency take it off the heat and allow it to cool. When it is partly cooled transfer it to a microwave safe container. Store it in a cool place until you are ready to use it. This wax will thicken up. All you have to do is heat it in the microwave oven for few seconds before application.
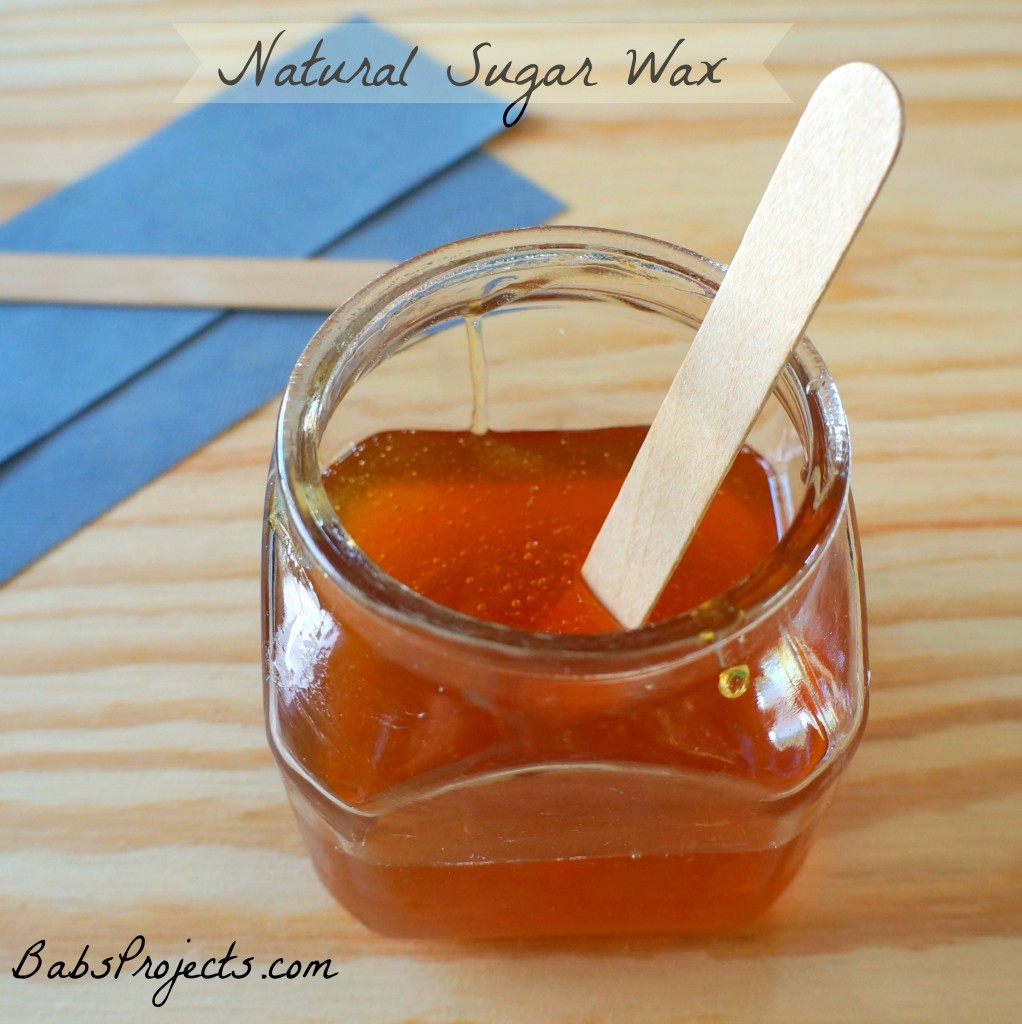
Note: If you find the sugar wax is too thick to spread then add two tablespoons of water, mix it and microwave it. This will dilute the wax and make it easy to spread on your arms or legs.
 Had a Blast at Live with Kelly and Michael Show
thank you for sharing! I’m totally making this!!
Thank you for sharing this recipe! I love how easy it is and all natural.
Wow, I have never heard of this or tried it, but thanks for the info!
Healthy and easy and might not be so bad! Never waxed before so I think I might try it LOL 🙂
Wait… so it’s hot wax without the actual wax? Cool. It’s probably so much cheaper than the real thing!
I get professionally waxed for some things, but this might be a nice at home DIY for those pesky hairs that are starting to sprout on my face. Stupid aging.
Go girl! I’ve tried various solutions to “DIY” and waxing is just the one thing that I don’t want to do myself.
I have never heard of someone making their own wax. What a huge money-saver!
I never knew how to make wax for waxing hair at home. I like knowing all the ingredients that go into it.
I am going to have to try this. I’ve tried some store bought waxes and they never did well.
My neighbor does her own sugar wax. It makes her skin look smooth and soft
Awesome and easy DIY project. I’ll have to try.
I always prefer natural or organic. I will have to try this out.
Oh cool I never thought this would be so easy! It would be fun to make the wax but I’d be afraid to use it by myself. Ouch!
I would want to eat this too! LOL. I don’t do any hair removal because I am fair skinned and don’t have many issues. I love how innovative you were with coming up with a solution to finding a cheaper alternative that still works well.
I don’t ever make my own wax. I go to the wax center and get my legs, underarms and brazilians done once a month. It’s pretty expensive so it’s good to know that I can do at least my legs myself. I will have to try this and see if it comes out just as good. Thanks for the recipe.
That is so cool, who knew it was so easy to make your own!
So cool! Can you eat it too, or is just for hair removal?
You can eat it as long as you have not used it Heather 🙂
Oh I will have to tell my sister in law! I haven’t done hot wax in years but she loves it!
WHAT I never even thought to make my own wax. This is for sure a lot cheaper and I love that it does not have any additives which I love. I will have to share with my girlfriends and maybe have a girls night to try this out.
Thank you for sharing. This will make such a difference for me
I am so glad you mentioned the wax warmer Flavia. I need to get one for myself.
Ouch! Waxing scares me but I am so glad that you found a way to make it cheaper.
And this worked well? Well Wow!! How does it wash off? I know with the wax (not sugar wax) that it is a bear to get off my skin.
Terry, you can simply wash it off with water or wet towel.
Also, best to have the wax warmer. It maintains the temperature and the wax will remain warm.
I have never heard of hot sugar wax before, but then again, I don’t wax myself LOL. I do pluck my eyebrows from time to time, but it’t not enough to wax because it;s only a few stray hairs.